For anyone with Celiac disease Thanksgiving can be stressful. There are many traditional side dishes that are not gluten-free. If you have Celiac, or have a love one affected by it, I have several side ideas in this week’s blog post for you.
Please remember, if you are new to gluten-free cooking, to make sure all of the ingredients you are using are gluten-free, including spices and extracts. A helpful tool is downloading some kind of gluten-free scanner onto your phone, a few of these are free. The app then allows you to scan the bar code of a product with your phone. There are some items that are not included in free app versions, but several of the major brands are.
I have four side dish recipes below; pressure cooker mashed potatoes, sweet potato casserole, cornbread stuffing, and “loaded” cauliflower.
I will also be including a recipe for fried onion strips, and gluten and dairy-free ”cream” of mushroom soup. Our little family does not typically eat green bean casserole, but those two items would be used for that traditionally. I do use the fried onion strips in the cornbread casserole, and use the “cream” of mushroom soup in chicken casserole. Both recipes pass the test.
Perfect Pressure cooker mashed Potatoes

Ingredients needed (approximately 8 servings)
- 2.5 lbs russet potatoes (approximately 8 potatoes)
- 2.5 cups gluten-free chicken (or vegetable) stock
- 1 tsp iodized salt
- 1 tsp black pepper
- 1/2 Tbs garlic powder
- * optional 3 Tbs butter for richer flavor
directions
- Peel potatoes.
- Slice potatoes into fairly thin slices (approximately .5 to 1 cm)
- Put the peeled, and sliced potatoes into your pressure cooker.
- Pour stock of your choice over the potatoes.
- Add salt, pepper, and garlic powder.
- Seal your pressure cooker lid.
- Cook on high pressure for 20 minutes.
- Once the potatoes finish cooking, release pressure, and carefully remove the lid.
- You can now add the butter if you choose to add it.
- Once the butter melts, mash the potatoes. Do this carefully at first, as there will still be quite a bit of residual stock.
- Once completely mashed, the potatoes and stock should be well mixed.
- Serve, and enjoy.
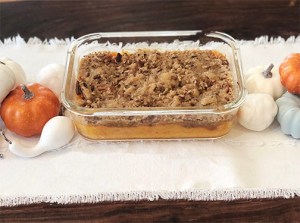
Gluten-Free Sweet potato Casserole
Ingredients Needed (approximately 6 servings)
For the potato mixture:
- 3.5 cups (approximately 2 medium) sweet potatoes, or yams
- water for boiling the sweet potatoes (just enough to cover the sliced potatoes)
- 1/2 cup butter, or butter alternative
- 1/2 cup milk (any variety)
- 1 tsp vanilla extract (please make sure this is gluten-free)
- 1 Tbs white sugar
For the topping:
- 2 Tbs 1:1 measure for measure gluten-free flour
- 1/4 cup softened butter
- 1/2 cup brown sugar, or coconut sugar
- 1/2 tsp ground cinnamon
- 1/2 cup chopped pecans (these could be left off if there is a nut allergy, the topping will still be delicious with the sugar mixture)
Directions
- Peel, and slice sweet potatoes.
- Add sweet potato slices to a large pot.
- Cover slices completely with water.
- Place pot onto burner, and set to high.
- Boil until soft, at high altitude this took approximately 30 minutes.
- While potatoes are boiling, grease a baking pan of your choice. (I used a smaller, odd size 6x8in, for the serving size pictured above)
- Once potatoes are soft, turn off heat, and carefully strain the water from the potatoes.
- Return the cooked potatoes to the pot, and add 1/4 cup butter.
- Let the butter fully melt.
- Mash the sweet potatoes.
- Add the milk, vanilla extract, and sugar to the mashed sweet potatoes, stir until well combined.
- Carefully pour the sweet potato mixture into the pre-greased pan. Spread evenly.
- In a separate bowl combine the brown sugar, flour, and cinnamon with a fork.
- Add the pecans to the sugar mixture, and combine again.
- Spread the sugar/pecan mixture evenly across the top of the sweet potato mixture.
- Bake at 350°F until the sugar topping begins to bubble. (this took 25 minutes at high altitude)
- Carefully remove from the oven.
- Let casserole cool slightly before serving.
- Enjoy
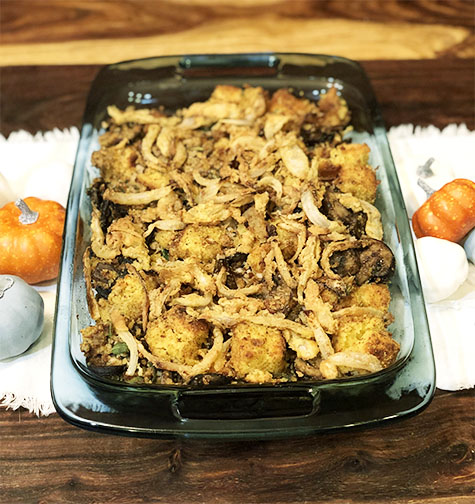
Gluten-free cornbread stuffing
Ingredients Needed for approximately 8-10 servings
- One package of gluten-free cornbread mix, and any ingredients the box requires
- 1 1/4 cup cooked gluten-free sausage
- 2 cups sliced, sautéed mushrooms *if desired
- 2 cups fried onions
- 1/4 cup fresh, chopped sage
- 2 cups chicken stock
- 2 tsp garlic powder
- *optional suggestion, 2 hard boiled eggs
Directions
*The cornbread will need at least 12 hours to dry. Please bake the cornbread early enough to give the cornbread enough time to dry properly.
- Prepare gluten-free cornbread as directed by package.
- Bake corn bread in an 8×11 pan.
- Carefully remove from oven, and allow to cool.
- Cut cornbread into one inch cubes.
- Place cornbread cubes onto a cookie sheet, and allow them to dry out for at least 12 hours.
- If you have not cooked the sausage, boiled the eggs (if desired), or sliced and sautéed the mushrooms, go ahead and do that. *The cooked sausage, eggs, and mushrooms can be kept in separate air-tight containers overnight, until the cornbread is dry enough to continue.
- Once the cornbread has dried, add the cubes to a large mixing bowl.
- Chop the fresh sage leaves, you will need 1/4 cup.
- Add the cooked sausage, mushrooms (if desired), diced hard boiled eggs, sage, and fried onions to the mixing bowl.
- Pour 2 cups of chicken stock over all of the ingredients in the mixing bowl.
- Add 2 tsp garlic powder to the top of the other ingredients in the mixing bowl.
- Stir all of the ingredients in the mixing bowl together until all of the stock has been absorbed into the cornbread, and each piece of bread has been well coated.
- Grease a 9×11 casserole dish.
- Pre-heat your oven to 375°F
- Add all of the ingredients in the mixing bowl to the pre-greased casserole dish.
- Place casserole dish in pre-heated oven.
- Bake for 25 minutes.
- Remove from oven carefully.
- Enjoy
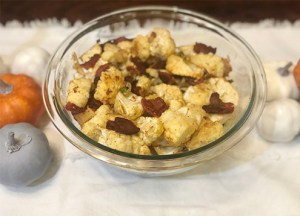
Loaded cauliflower
Ingredients needed for approximately 4 servings
This recipe can easily be doubled. Consider using only one bunch of chives. Everything else will be doubled normally.
- 1 head of cauliflower
- 6 chives
- 1/4 cup avocado or olive oil
- 1/2 tsp kosher salt
- 1/4 tsp black pepper
- 1 tsp garlic powder
- 1/2 tsp paprika
- 1/2 of one package of gluten-free bacon (approximately 6 slices)
Directions
- Begin pre-heating your oven to 400°F.
- Cut bacon into 1 inch squares.
- Cook cut bacon until it at least meets required temp.
- Drain cooked bacon in a bowl with a paper towel.
- Chop cauliflower into bite-sized pieces.
- Slice chives into thin slices.
- Add cauliflower, bacon, and chives to a large mixing bowl.
- Pour oil over the top of the ingredients in the bowl.
- Add all spices.
- Stir until all ingredients are well combined.
- Grease a large baking pan with edges.
- Pour the cauliflower mixture onto the greased pan.
- Place cauliflower in the oven, and bake for 20 minutes.
Vegan loaded cauliflower alternative
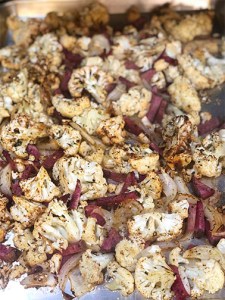
As an alternative to the recipe above with bacon, consider adding radishes and roasting with the cauliflower instead of bacon. All other ingredients and directions will remain the same.
Ingredients needed for 4 servings
- 1 head of cauliflower
- 6 chives
- 1/4 cup avocado or olive oil
- 1/2 tsp kosher salt
- 1/4 tsp black pepper
- 1 tsp garlic powder
- 1/2 tsp paprika
- 1 bunch of radishes
Directions
- Begin pre-heating your oven to 400°F.
- Chop cauliflower into bite-sized pieces.
- Slice chives into thin slices.
- Slice radishes.
- Add cauliflower, radishes, and chives to a large mixing bowl.
- Pour oil over the top of the ingredients in the bowl.
- Add all spices.
- Stir until all ingredients are well combined.
- Grease a large baking pan with edges.
- Pour the cauliflower mixture onto the greased pan.
- Place cauliflower in the oven, and bake for 20 minutes.
Fried onion strips
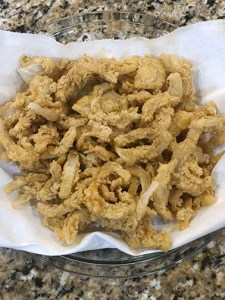
I use these fried onion strips in my stuffing recipe (above). You can also combine them with my ”cream” of mushroom recipe (below) and green beans for green bean casserole. I don’t have a green bean casserole recipe for you, but you should be able to use the two recipes included here with a green bean casserole recipe you find online. Regular fried onions will not be gluten-free, nor will regular cream of mushroom soup.
Ingredients
- 1 large yellow or sweet onion
- 2 eggs
- Dash of salt
- Dash of pepper
- 1 Large seal-able food storage bag
- 1 cup 1:1 measure for measure gluten-free flour
- 1 tsp garlic powder
- 1 cup avocado oil
Directions
- Slice the onion into thin strips.
- Crack the two eggs into the large food storage bag.
- Break up the egg yolks by squeezing them through the bag, or carefully with a fork.
- Add a dash of salt and pepper to the egg mixture in the bag.
- Add the onion slices to the bag.
- Seal the bag while slowly pressing out excess air.
- Coat the onion slices with the egg mixture. You can do this easily and mess free (thanks to the bag) with your hands and a kneading motion.
- Open the bag and add one cup of flour.
- Seal the bag while carefully releasing some air once again.
- You will now be using the same technique you used in step 7 to coat the onion and egg with flour.
- Pre-heat 1 cup of oil in a pan (I prefer cast-iron)
- Add a pinch of flour to the oil, when the flour begins to bubble, the oil is hot enough to fry the onions.
- Once the oil is hot, slowly add half of the coated onion slices.
- Fry the onion slices until they are a gold color, remove from the oil with tongs, and place on a plate with a paper towel.
- Repeat step 14 for the other half of onion.
Dairy and gluten-free ”cream” of mushroom
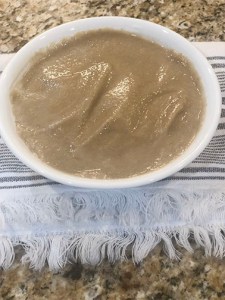
Ingredients for approximately 10 oz
- 2 6.6 oz cans of sliced mushrooms, drained
- 8 oz chicken or vegetable stock
- 1/2 tsp salt
- 1/2 tsp garlic powder
- blender
Directions
- Open and drain both cans of mushrooms.
- Pour mushrooms into blender.
- Add chicken or vegetable stock.
- Add salt and garlic powder.
- Blend until all ingredients are well blended, and mixture looks smooth.
- Use in any recipe that calls for cream of mushroom soup.

